Principled Organic Materials
Getting Started Demo Tutorial
Check out our tutorial video below for a 30 min walk-through of:
- What's contained in the .blend files of this product.
- How to append materials to your own Blender scenes.
- Basic customization using our easy-to-use node groups.
Installation
This product is not an "add-on", so it does not need to be installed in the same manner that you would install a code-based add-on. This product is distributed as .blend files. The .blend file contains a set of preview spheres (one for every material), and each sphere has one of the materials applied to it. You can transfer the materials in this .blend file into your own scenes in the same manner that you would transfer materials between your own blender files: by appending the materials from the .blend files or by adding the .blend file to your asset browser library.
Be sure to download the correct .blend file for the version of Blender you are using! For example, principled_organic_v1.0_blender_4.1 is for Blender version 4.1 and later. There have been multiple changes to the shader nodes over the course of Blender's development, so .blend files designated for later versions of Blender will not work with earlier versions of blender.
Asset Browser Method
All of the materials in the Principled Organic Materials .blend file are ready-to-use as asset browser assets. Just copy the .blend file into the folder you are using for your asset library, and you're ready to go. Check out this tutorial below, or if you prefer written instructions, we have those next.
If you haven't set up your asset browser libraries, go to Edit -> Preferences -> File Paths. You can either create a new library by clicking the "plus" (+) icon, or use your existing default User Library. Just make sure the file path is set the folder where you will be storing the Principled Organic Materials .blend file assets.

Now, just open up an Asset Browser Window and you're ready to start dragging and dropping materials right onto your meshes.

Append Method (drag and drop)
- Download the .blend file that is appropriate for the version of blender you are using. For example, "principled_organic_v.1.0_blender4.1" is designed for blender 4.1 (it is v.1.0 of this product release). Note that there have been changes to the Blender shader nodes over time, so files designated for newer versions will not work with older versions of Blender.
- Place the .blend file in a file location on your system that is convenient.
- Open the .blend scene where you would like to use the materials.
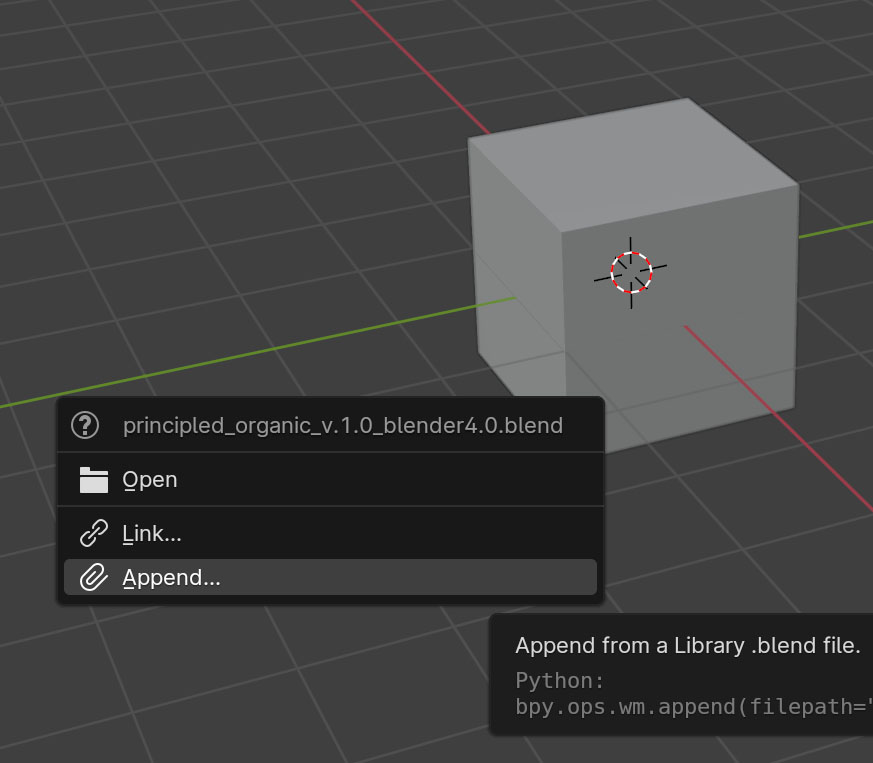
- Drag the principled_organic .blend file into your .blend scene. A dialog will appear asking whether you want to open the file, link the file, or append. Choose append. Alternatively, go to File -> Append... in the Blender top menu and navigate to the file location where you have saved the product .blend files.
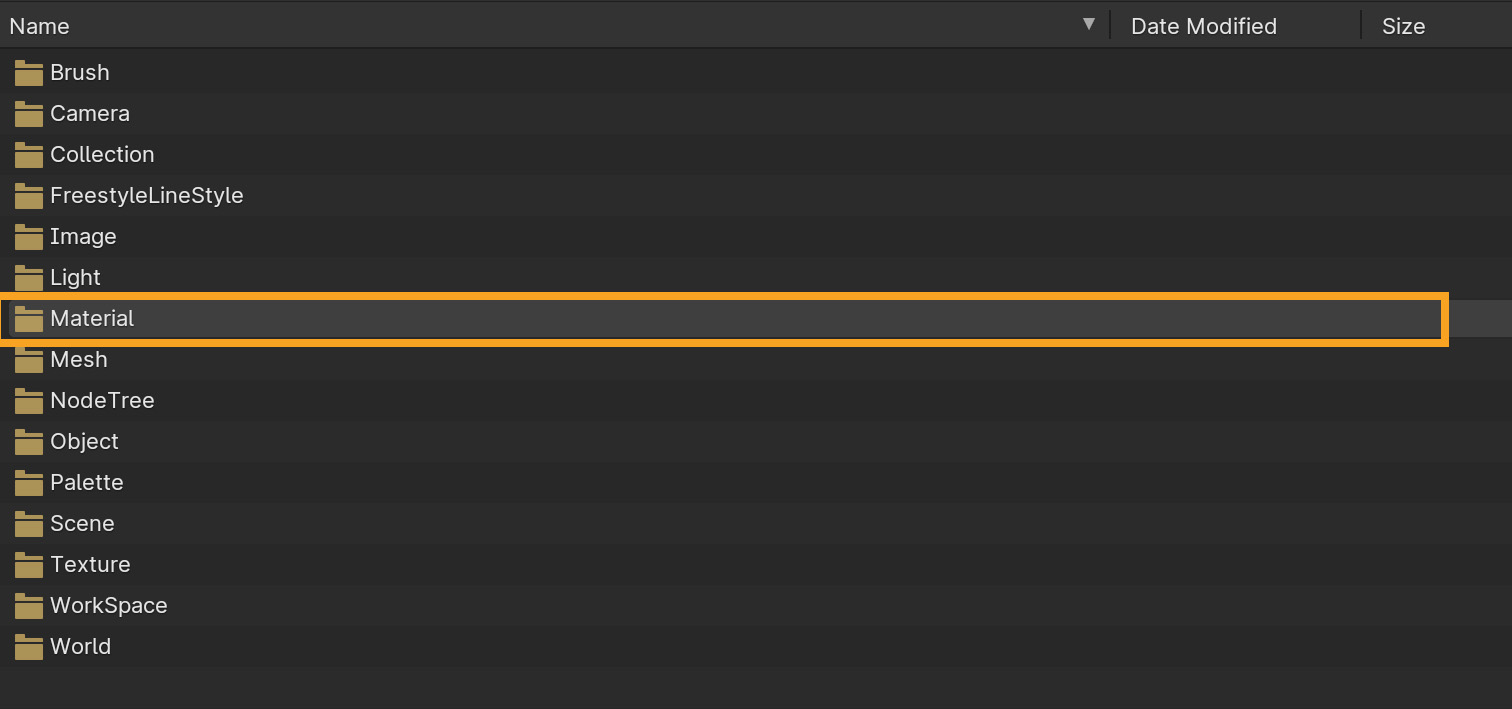
- A new file explorer window will open with several folders. Open the folder named "materials".
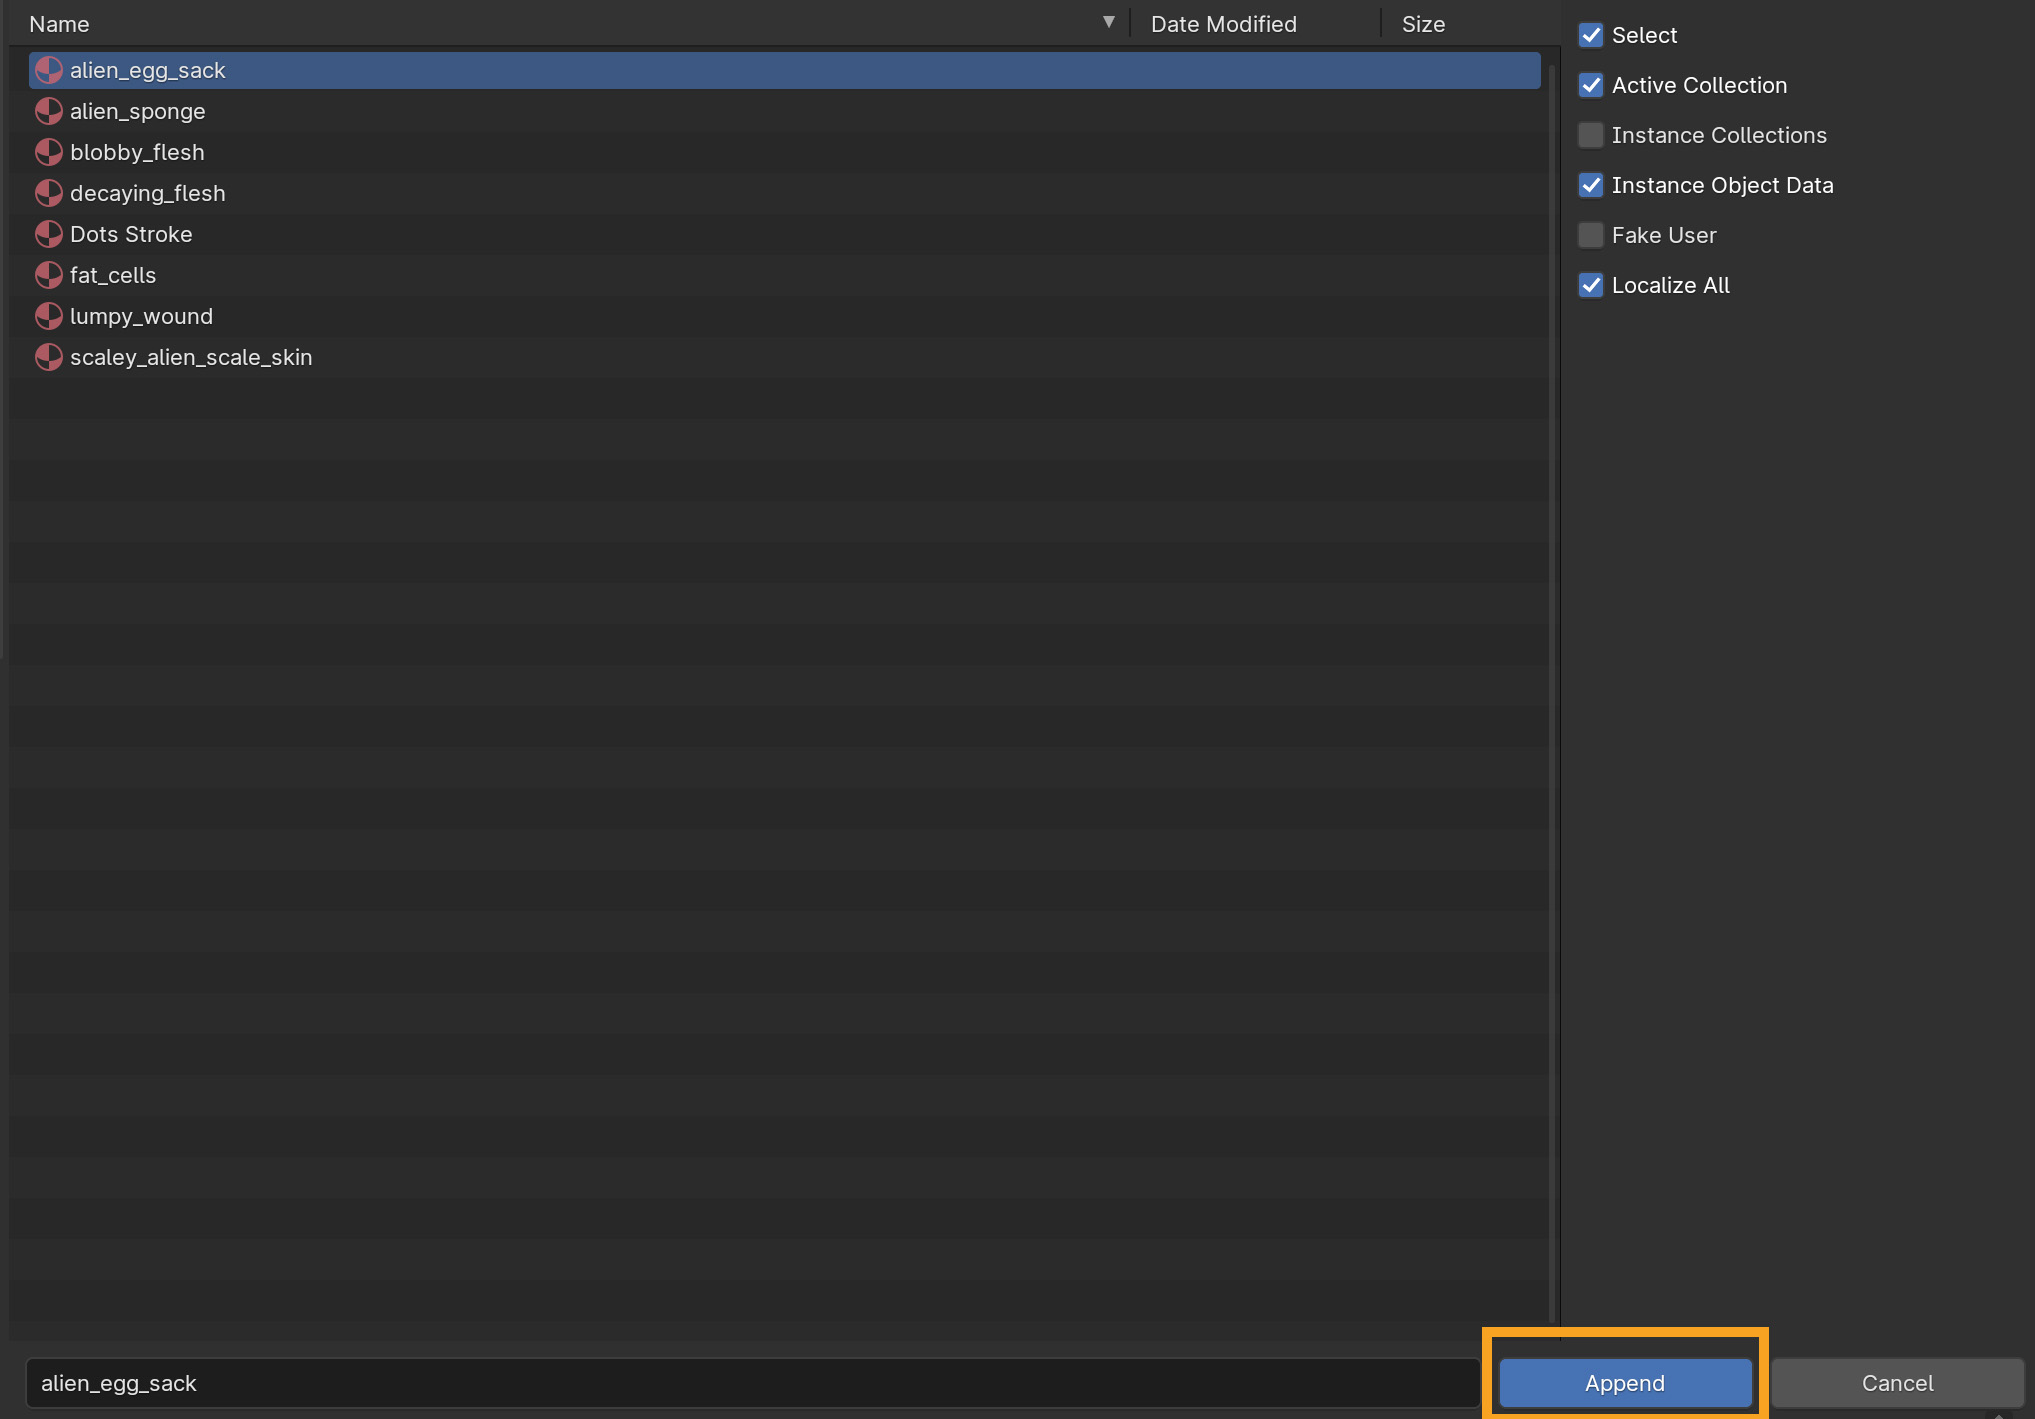
- Highlight one or more of the materials that you would like to append. Click the "append" button.
- You can now apply the material to any object in your scene where you have appended the file in the same manner that you would apply any other material.
Rendering and shading setup
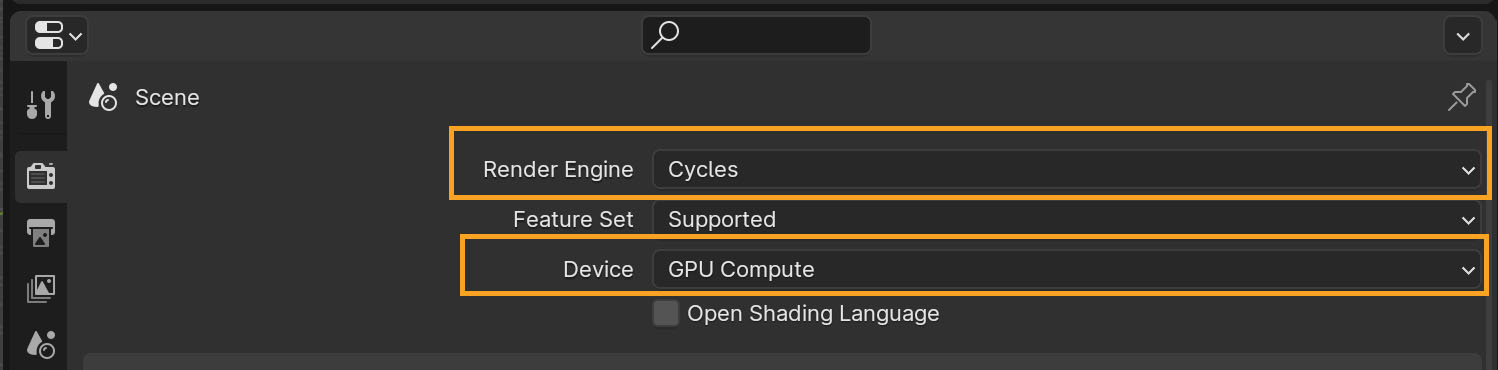
- Enable "Cycles" as your render engine, and set the device to "GPU compute" if you have a GPU. While these materials are compatible with Eevee and CPUs, you will only be able to get the real geometric displacement in Cycles, and you will get far better performance with these shaders with the GPU.
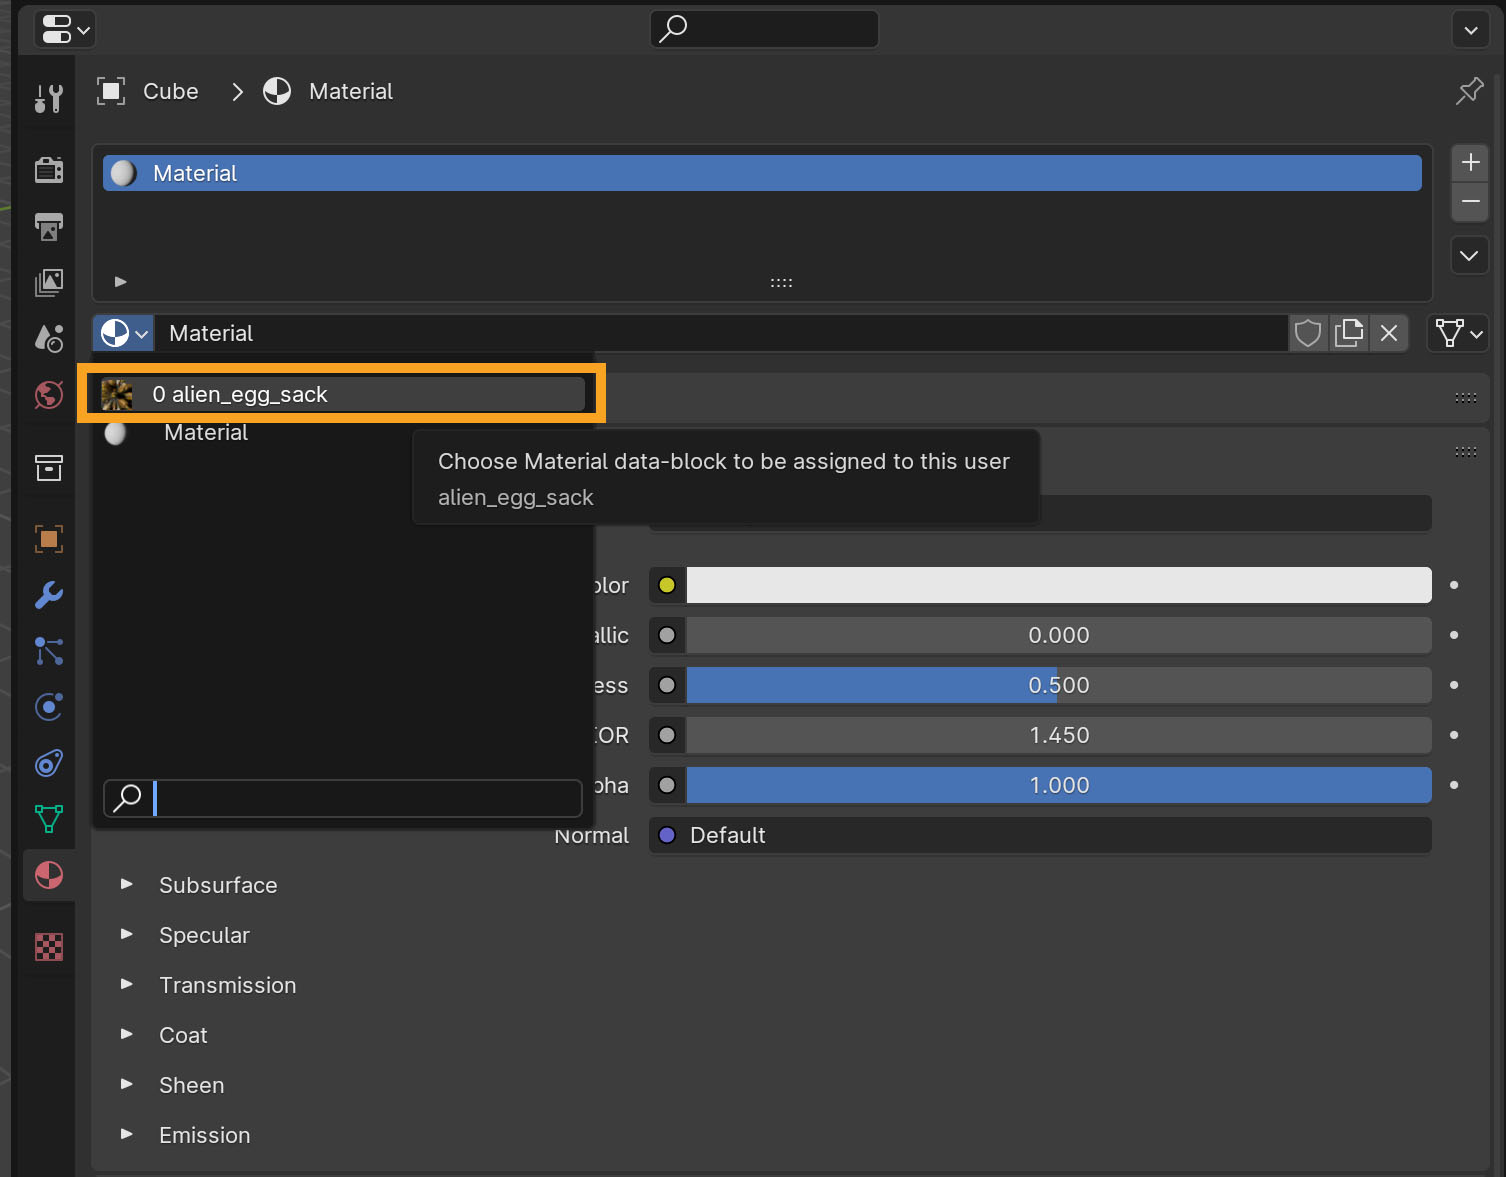
- Select the mesh that you would like to apply the material you have appended. Go the the "Material" tab and you will find the material(s) you have appended in the drop down material selection menu.
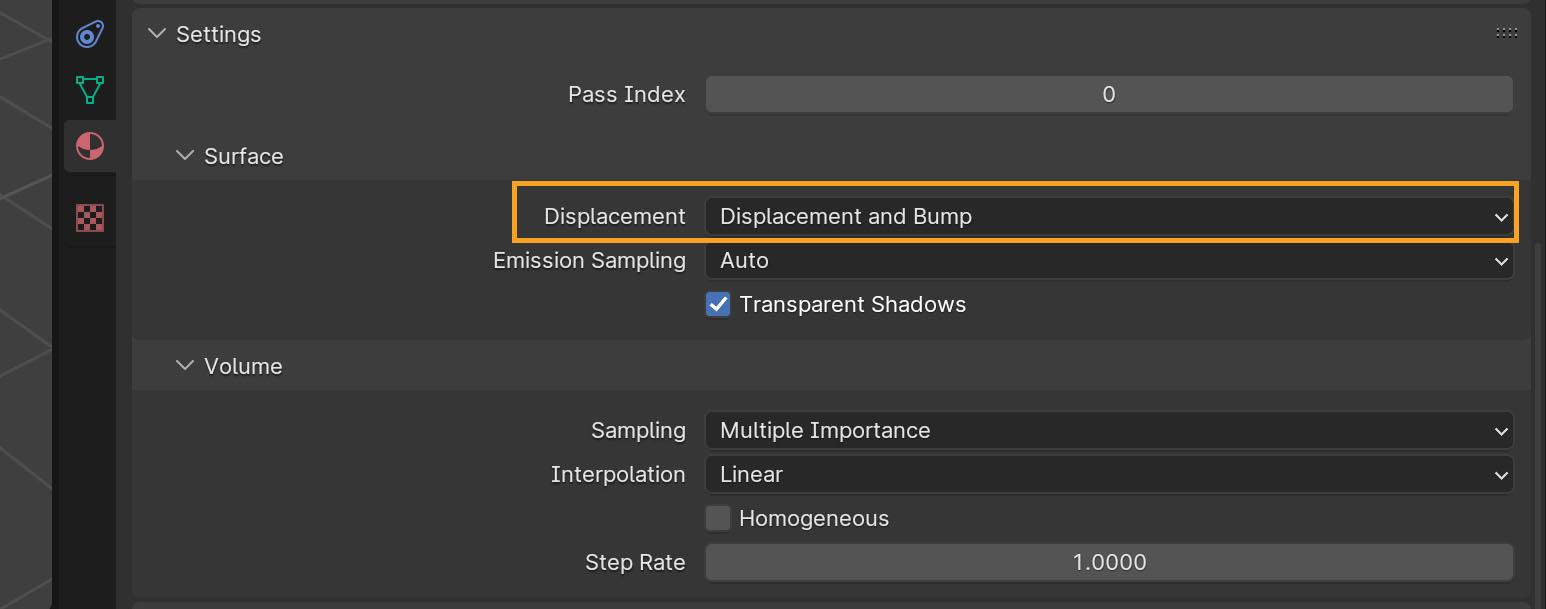
- In the "Material" tab, scroll down until you find the "Settings" expandable menu. Expand the menu and make sure displacement is set to "Displacement and Bump." Please note that the level of detail in the actual displacement depends on the density of your mesh. Higher poly and more subdivided meshes will support finer detail for the displacement.
Using the Nodes
The Principled Organic Materials nodes work similarly to the Principled BSDF shader. Apply the material to your mesh of choice. A node network will automatically be set up with a simple node group for customizing the look of the material, which you can access through the shader editor. You'll need to be in the shader editor if you want to use UV coordinates instead of generated coordinates, or if you want to combine these shaders with other nodes to create even more complex materials.

Alternatively, the same options can be found in the "Material" tab under the "Surface" menu, the same place you would find customization options for the Principled BSDF shader if that had been applied.

Just like the Principled BSDF, you can alter numerical values by either clicking and dragging, or manually typing in values. Note that many of parameters have "soft caps" that will limit the values within a specific range when just clicking and dragging. However, you can often get even more extreme effects by overriding these soft caps by manually typing in values.
Universal Node Outputs
All of the Principled Organic Materials nodes have the following outputs.
BSDF: The shader output. This should be connected directly to the "Surface" node of the "Material Output" node, or can be used with a "mix shader" node to blend these materials with other shaders.
Displacement: Vector encoding the surface displacement. Should be connected with the "Displacement" node of the "Material Output" node, or can be used with a mix node (vector value) to blend and mix the displacement with outputs from other shaders.
Color: Contains just the color information of the shader. Does not need to be connected for normal usage. However, this node can be useful if you want to build your own shaders on top of these materials. For example, want to make a semi-transparent shader that has all of the color info from these shaders?
Universal Node Inputs
All of the Principled Organic Materials nodes have the following inputs.
Vector: Texture coordinates to evaluate the noise fields. This is the same input as would be input into, for example, the "Noise Texture" node in the standard Blender shader nodes. By default, these materials are set up with the "generated" texture coordinates input. However, you can also control the noise field based on the uv coordinates or other texture coordinates, or use the upstream mapping node to adjust the location, scale, and rotation of the noise fields on the mesh.
Roughness: Same as the Principled BSDF roughness. Controls the roughness of the specular reflection. Note that the decaying_flesh shader actually has two inputs for Roughness: "Pus roughness" and "Skin roughness," which allow for independent control of the outer skin and the interior pus.
Clearcoat/ ClearCoat weight: Same as the coat weight in the Principled BSDF, which creates an appearance like a thin reflective coating on the surface. Increasing this can make the surface look like it has a thin, wet coating on top.
Clearcoat roughness: Same as the coat roughness in the Principled BSDF. Controls the roughness of the reflections from the clear coat.
Subsurface weight: Controls the overall strength of subsurface scattering (0 to 1). Same as the Principled BSDF
Subsurface scattering weight. Note that this option is only available in later versions of blender, not in 3.3 and 3.6.
Subsurface scale: Controls the length scale for scattering of the the subsurface scattering. Same as the Principled BSDF subsurface scale.
Displacement Global: Controls the global strength of the displacement, affecting all geometric features uniformly. You can override the soft caps to produce negative values, which will cause the direction of the displacement to be flipped, so that regions that protruded outward now are pushed inward.
Similar Node Inputs
All of the Principled Organic Materials have variations of these types of node inputs, but they control different features in different materials. The best way to get a sense for how these affect the materials is to just experiment with them!
Color: Every material has multiple different color options that control different features on the shader. For example, the Alien Egg Sac shader material has independent color controls for the veins, the grooves between the "eggs," and has two different colors that are blended together within the eggs themselves.
Noise texture scale: All of the features on these procedural materials are generated using Blender's various noise textures. Most materials have multiple different scaling options for different geometric features. In general, increasing the scale will increase the frequency of the noise pattern, and decreasing the scale will make the noise pattern appear more coarse and repeat less frequently.
Offsets: Again, these procedural materials are generated using a collection of noise textures. The offsets allow you to globally alter the position that these noise textures are evaluated at, shifting where different features are positioned on the mesh. There are typically different offsets for different geometric features (for example, the lumpy features vs the veins).
Advanced Customization: Diving Under the Hood
Want to gain access to even more customization, like changing the method used for subsurface scattering, adding transmission, or adding even more customization options to the shaders? Or, want to learn a bit more about how these shaders are working?
You can dig in under the hood of any of these shaders. Just select the node group in the shader nodes window and hit the TAB key.

You will be greeted by one of these larger node networks. A great place to start is on the far right. All of these materials are piped into a Principled BSDF node. We haven't exposed all of the settings of the Principled BSDF, because we didn't want all of the options to be overwhelming.

For example, check out how the Alien Egg shader changes when the subsurface scatter type in the Principled BSDF is changed from "Random Walk" to "Random Walk (Skin)":

If you find that there are options in the Principled BSDF that you wish were available in the top level node, please let us know! If we think that exposing an option will improve the experience of our users, we're happy to incorporate it in a future product update.
Choose a product version:
| Sales | 10+ |
| Downloads | 20+ |
| Dev Fund Contributor | |
| Published | about 1 month ago |
| Blender Version | 4.1, 4.0, 3.6, 3.3 |
| Render Engine Used | cycles, eevee |
| License | Royalty Free |
Have questions before purchasing?
Contact the Creator with your questions right now.
Login to Message
Tags:
wound, gore, cells, flesh, science fiction, organic material, AlienEgg, medical science, biosciences, biology, zombie, organic, horror, Scales, biological, alien