Reflector - City Traffic Shader
How to use it
- Import the shader node into your current project with File>Append
- Select the "Reflector Shader.blend" file. The "Reflector" node can be found in the NodeTree folder
- Use it in a material with "Add Node > Group > Reflector"
To have the lighting look correct, connect a normal map. If you don't want to use one, just add a normal map node and leave it at the default colour.
The patterns use a UV map. For the default one use Texture Coordinate > Generated.
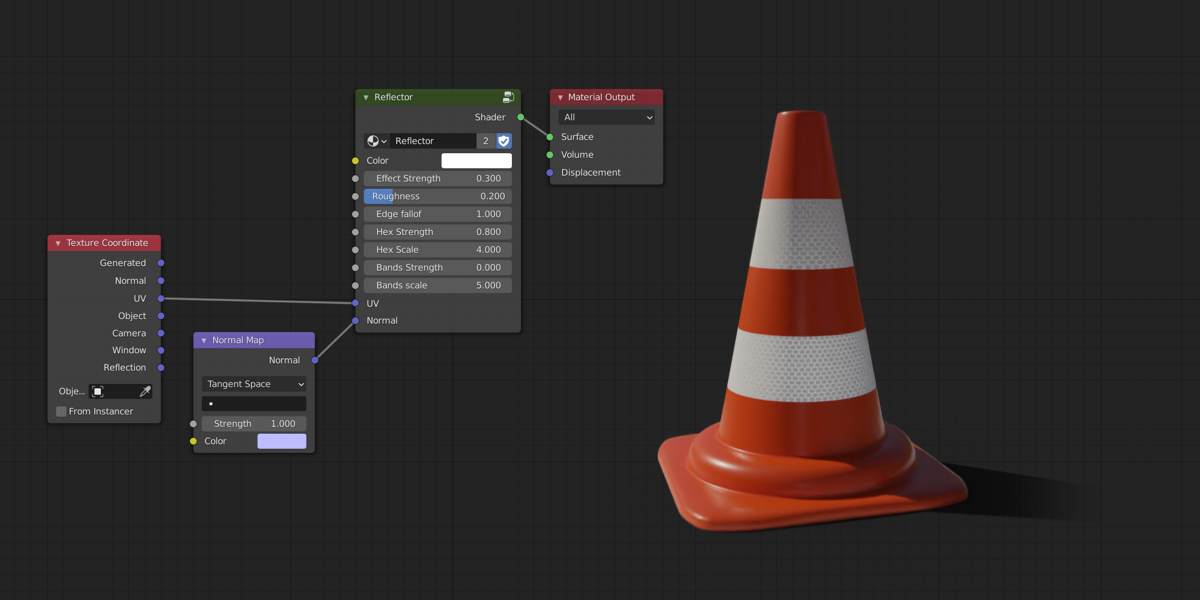
Settings
Colour
Sets the main colour and pattern, use any texture you want.
Effect Strength
Sets the amount of reflected light, in real life reflectors this can be around 20%-60%. So for realism it should be set to something lower than 1.
Roughness
Reflectors shine the brightest when the light is directly behind the camera. With higher roughness these highlights blend more and are more visible from different angles. Recommended values are 0.05-0.5.

Edge Falloff
Fades the reflector at shallow angles. Note the brow of the monkey in the comparison below. Recommended values are 0 to 1.

Hex Strength
Decreases the strength of the reflector in the center of the hexagons. The hex outlines will always stay as bright. Works best with a value of either 0 or 0.7-1.0.
Hex Scale
Changes the scale of the hexagon pattern. Larger values mean that there are more hexagons.
Bands Strength
Decreases the strength of the reflector in alternating bands. Recommended values are 0 to 0.4.
Bands Scale
Changes the scale of the band pattern. Larger values mean that there are more, thinner, bands. Direction is determined by the UV you're using.
| Sales | 60+ |
| Customer Ratings | 1 |
| Average Rating | |
| Dev Fund Contributor | |
| Published | about 3 years ago |
| Blender Version | 4.0, 3.6, 3.5, 3.4, 3.3, 3.2, 3.1, 3.0, 2.93, 2.92, 2.91, 2.9, 2.83, 2.82, 2.81, 2.8 |
| License | Creative Commons |
Have questions before purchasing?
Contact the Creator with your questions right now.
Login to Message