Pottery Shader.V2 (Eevee/Cycles)


This is the Pottery Shader.v2, your one stop for all pottery and ceramic materials you'll (hopefully) ever need. Just get the .blend file and append the pottery material and your are good to go!
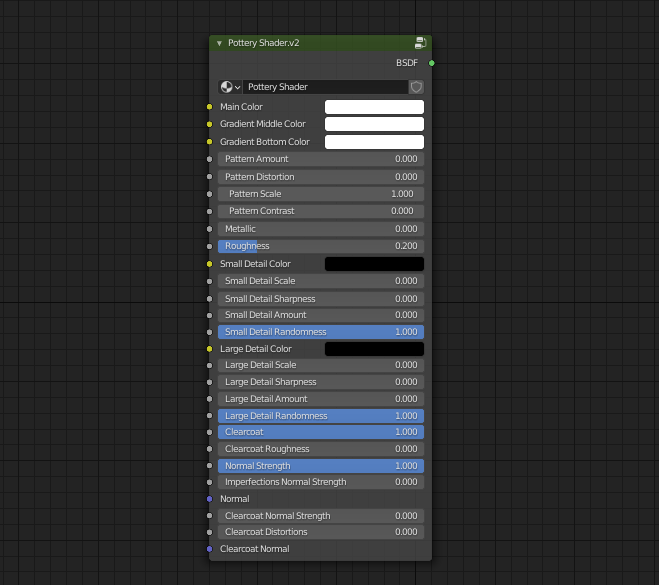
In here I will explain and describe what the different sliders do so that you can start using the shader right away:
-
Main Color: The main color of the material.
- Gradient Color (Middle|Bottom): This two inputs control the color of the object each of them correspond to a point of a gradient that is used to define the patterns. When the 'Pattern Amount' is set to 0 only the Main Color is used.
- Detail Color (Small|Large): This tow options control the color for the detail for each specific scale.
- Detail options (Scale|Sharpness|Amount|Randomness): Both Detail levels contain some options to get them to look exactly how you want it. Scale controls how big each detail level looks. Sharpness control how sharp the imperfections are (like the difference between a small bump and a hole). Amount controls how much of the detail gets through. And finally randomness affects how random the imperfections are (if 0 it looks sort of like a grid).
- Pattern Amount: If disabled (0) the the overall color will be uniform, as you start to increase the value, a gradient will appear using the colors set on the options above.
- Pattern Distortion: controls the "warpiness" of the pattern. If set to 0 the pattern will resemble rings and as you increase it the rings get more and more distorted.
- Pattern Scale: controls the scale of the pattern.
- Pattern contrast: controls the contrast between the color of the gradient.
- Metallic: If you wish to make the object metallic then go for it!
- Roughness: overall roughness of the material.
- Clearcoat: clearcoat amount.
- Clearcoat Roughness: the roughness of the clearcoat.
- Normal Strength: the overall strength of the normals.
- Imperfections Normal Strength: controls the normal values of the surface details that you can set with the options above.
- Normal: add you own normal map on top of the imperfections that are automatically created.
- Clearcoat Normal Strength: the overall strength of the normals for the clearcoat.
- Clearcoat Distortions: controls the normal values of the surface distortions that are automatically created using the pattern design.
- Clearcoat Normal: add your own normal map for the clearcoat on top of the distortions that are automatically created.
NOTE / DISCLAIMER: The are some know limitations when it comes to using procedural textures as normal maps in EEVEE that may cause some slowdown when previewing it, this does not affect render times, its just the preview that gets slowed down when looking to close at the material.
The material now comes with a Material Duplicator addon, since this material relies on drivers for most of its operation and until the bug that prevents the material from being duplicated correctly is fixed, I decided to make this addon in the meantime.
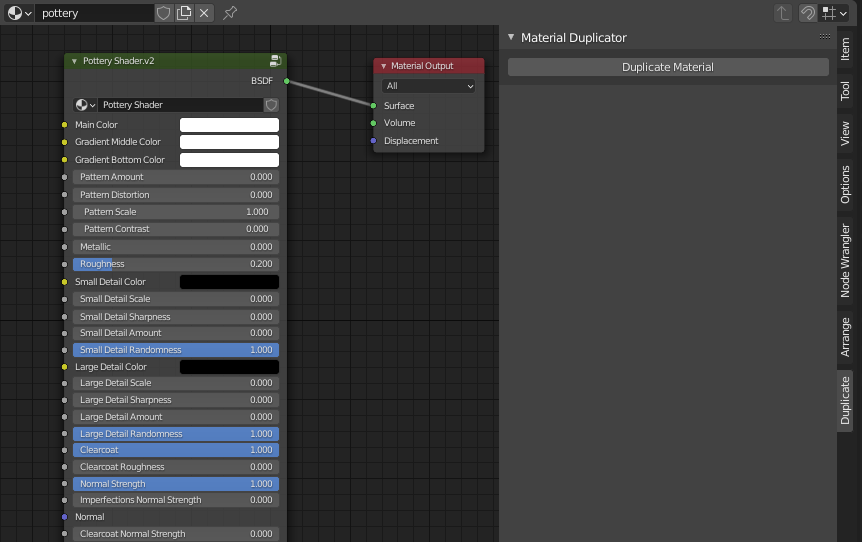
Just choose the Preferences -> Addons -> Install from file... and select the materialDuplicator.py file. This will add a "Duplicate" tab on the properties panel of the Node editor. This makes a new copy of the current material and handles all references used for drivers inside of the material, making it truly "single user".
| Sales | 30+ |
| Dev Fund Contributor | |
| Published | over 3 years ago |
| Blender Version | 2.9, 2.91 |
| License | Creative Commons |
Have questions before purchasing?
Contact the Creator with your questions right now.
Login to Message