Mechanical Creature Kit
How to install Mechanical Creature Kit in the Asset Browser

Step 1: In Blender (version 3.3 or later) go to Edit -> Preferences.

Step 2: Under File Paths, find Asset Libraries.

Step 3: Click the ‘+’ icon to add an Asset Library.

Step 4: Locate the folder. Let’s pretend this folder has the same name as your file, and that I’m not being lazy by reusing the same screenshot from an older version!

Step 5: When inside the folder (it will look empty), click Add Asset Library.

Step 6: In a new .blend file, set the Editor Type to Asset Browser.

Step 7: Change from Current File to the asset pack.

Step 8: Done! Now you can click and drag any object from the asset browser on the right into the 3D viewport on the left.
Important notes
All models are modelled to scale, so the models you import might be a lot smaller in size than what you are used to work with.
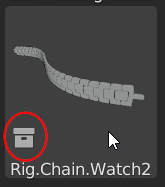

In order to edit Collection assets (like Rig.Chain.Watch2 marked with a red circle), you need to disable instancing (also marked with a red circle). Alternatively, you can press CTRL + Z after importing an asset to remove instancing for that asset. Please note that this will not work in Blender 3.2 or earlier.

To work with multiple versions of the same rig, the asset importer must be set to ‘Append’.

Trying a new part? Check out the modifiers! Some objects in the pack come with powerful customisable modifiers. For example this Spring has a Geometry Nodes setup where you can adjust various attributes of the asset in a non-destructive way.
So, how do I make an animated mechanical creature with this thing?
If you wish to make an animated mechanical creature with the included Creature Rigs, it is highly recommended to import a rig before you start kitbashing. This makes it much easier to line up the parts with the joints while you work.
Here is the suggested workflow:
Import an armature object from the ‘Creature Rigs’ category.
Get a feel of the rig in Pose Mode. E.g. test the IK, which bone axes are locked etc.
In Object Data Properties, set it to Rest Position
Click-and-drag to import anything you’d like! Go crazy!
Line up objects to the bones of the armature.
Parent each object to their respective bones.
Set the rig back to Pose Position.
-
Press play, and you have an animated creature in your scene!
These steps are visually explained in the product demo video: https://youtu.be/JSLgXXx-4A8

All the Creature Rigs come with a default animation of at least 250 frames. The animation is a great way to test your creature design!
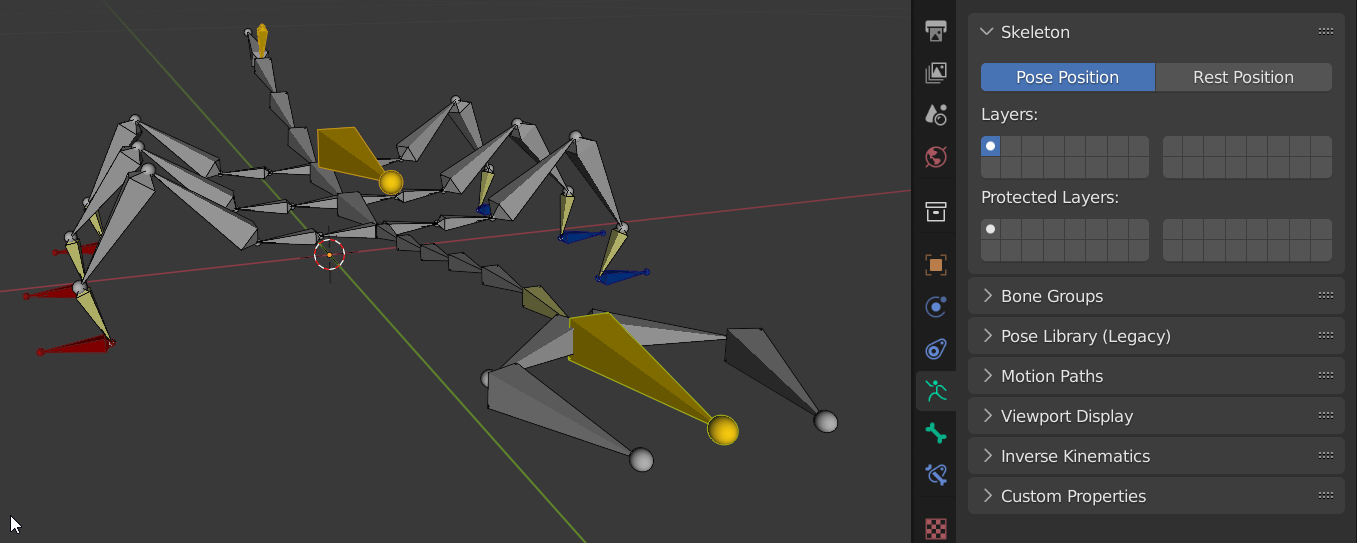
Red is Right, Blue is Left. Bones with color (visible in Pose Mode) are meant for controls. It’s not recommended to parent objects to them, as they might float around or behave unnaturally.

Pro tip: If you reset the location of the Armature in Object Mode, the bones will line up with Blender’s grid in Rest Pose - this makes it much easier to place objects accurately.
Choose a product version:
| Sales | 500+ |
| Customer Ratings | 12 |
| Average Rating | |
| Dev Fund Contributor | |
| Published | over 1 year ago |
| Blender Version | 4.1, 4.0, 3.6, 3.5, 3.4, 3.3 |
| Render Engine Used | cycles, eevee |
| Misc Data | rigged, animated, low-high-resolution, textured |
| License | Royalty Free |
Have questions before purchasing?
Contact the Creator with your questions right now.
Login to Message